Siebel SmartScript allows business analysts, call center managers, and Siebel developers to create scripts to define the application workflow for interactive customer communications. The script determines the flow of the interaction, not the agent or customer.
Terminology
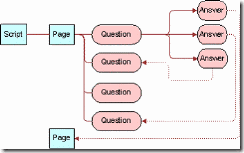
· Script: The object that contains all subsidiary content and procedural elements for directing the workflow for an interaction. It consists of a name and a collection of pages, and the branches needed to move between the pages.
· Page: The logical grouping of questions within a page that display together for the user.
· Question: A script element that is a question to be asked of customers, or a text message that provides information to the agent. Questions are displayed on pages.
· Answer A script element that represents an answer to a question. Answers appear as data entry fields or as any of several types of UI elements, including check boxes, drop-down lists, and multi-value groups.
· Translation: A text string used to display script elements in languages other than the original, so that scripts can be used in multilingual call centers.
· Branch: The transfers of control inside a SmartScript that define the display and processing sequence of pages or questions. Script branches transfer control from a question in one page to a question in another page, while Page branches transfer control from one question to any other question within a single page. NOTE: Page branches override script branches.
· Page section: The logical grouping of questions within a page that display together to the user at one time.
About Data Storage in Siebel SmartScript
■ In a generic answer table. This table is always available without further configuration. This
storage method is particularly useful when data is to be summarized later through an external
system. Data stored in answer tables can be extracted for external processing by using the Siebel
Enterprise Integration Manager.
■ In a particular business component field.
Steps to Create Smart Script
1. Understand your business scenario, and map out your design.
2. Create questions and translations.
3. Create answers.
4. Create pages: In the First Question field, select the question that you want to appear first on the page.
5. Create the script.
6. Add questions to pages.
7. Add pages to the script.
Example of Creating a Simple SmartScript
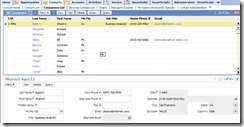
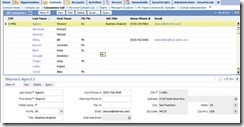
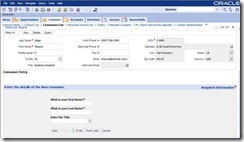
In this example we shall create a SmartScript to edit the Consumer record. The final Solution should something look like below
We need the following Elements
1. Five Questions for Capturing the following Consumer details
a. First Name - Text
b. Last Name - Text
c. Title – Dropdown(will have Answers Mr. Miss. Dr. Mrs.)
d. Email Address - Text
e. Job Title - Text
2. Two Pages to hold these Questions
3. One Script to hold the two pages
Create Questions
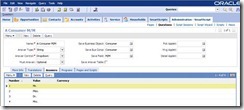
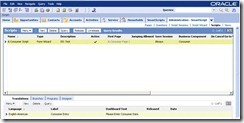
1. Navigate to Administration SmartScript -> Questions and Create a New Record
Enter the Details in More Info tab
· Name: Name of the Question
· Answer Type: Type of Input Argument
· Answer Control: What input field will be used Dropdown, radio button etc.
· Must Answer: Used to make a Answer required.
· Save Business Object: Business Object
· Save Bus Comp: Business Component
· Save Field: BC Field
Enter the Details in Translations Tab: The string entered here will be displayed on the screen
Enter the Details in Answers Tab:
Some of the Questions may have predefined answers when the Answer Control is Dropdown, Checkbox or radio button.
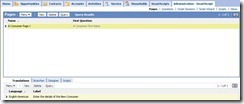
Creating Pages
Enter the following details for creating a new Page
· Name of the Page
· First Question: First Question to appear on the page.
· Translation Details: This Label will appear on the top of page
Designer Tab
In the designer tab link all the questions which should appear on that page using the workflow
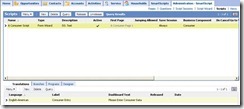
Create Script
Once all the pages are created, link all the pages using the script
Following details are required
· Name: The Name of the SmartScript
· Language: Language for the translation
· Label: This label will be displayed on all the Script pages for the OM language
Link all the pages using the Designer tab
Once all the pages are linked, a branch is seen in the Branches tab.
Verify the Script
Once the script is ready verify it using the Smartscript verification tool
From the Menu Bar select “verify”
If there are no errors following screen will be seen.
Releasing the SmartScript
From the Scripts view click on the Release Button
After Clicking the Release button in the Translations tab the “Released” flag will be checked and the Released date will be populated.
Invoking SmartScript
Invoking SmartScript using the “RunCallScript” method
RunCallScript, invokes a SmartScript from an applet so the SmartScript updates the currently active record.
RunCallScript positions the SmartScript on the currently active record from the applet from which the SmartScript was invoked. This can be invoked by filling in the Method invoked property of the button to be RunCallScript.
RunCallScript SmartScriptName, pathID, language, currency
Siebel Applet Button Examples
Function WebApplet_PreInvokeMethod (MethodName As String) As IntegerSub
if MethodName = “MyRunCallScript” then
InvokeMethod “RunCallScript”, “Pentium II Script”,””,”ENU”,”USD”
WebApplet_PreInvokeMethod = Cancel Operation
else
WebApplet_PreInvokeMethod = ContinueOperation
end if
End Function
We will try to invoke this method using a custom button.
1. Open Siebel Tools, Locate and Lock the Applet where we need to add the new button.(ex. Consumer List Applet)
2. Add the new Control as seen below
| Name | Call Script |
| Caption | Script... |
| Caption - String Reference | SBL_SCRIPT...-1009113206-JML |
| HTML Row Sensitive | Y |
| HTML Type | MiniButtonEditNew |
| Method Invoked | RunCallScript |
3. Map the Control to the Applet Placeholder using “Edit Web Layout” option.
4. Compile the Applet object.
5. Navigate to Administration – SmartScripts à Views
6. Query for the view name containing the above applet(View: Consumer List View) and add the name of the SmartScript to invoke in the Auto SmartScript field
7. Click on the Clear Cache button.
8. Navigate to the Consumer List View to test the SmartScript
9. Click on the Script.. button to invoke the script
Setting SmartScripts to Open Automatically
SmartScripts can run automatically when a user navigates to a particular view. In this example when the user Navigates to the Consumer List View the SmartScript should start automatically.
To configure SmartScripts to run automatically, add the SmartScript Player applet to the view, and associate a SmartScript with the view.
1. Use Siebel Tools to add the SmartScript Player applet to a view. Applet Name: Smart Script Player Applet (Player Only)
2. You may also need to add the concerned BusComp to the BusObj.
4. Navigate to Administration - SmartScript screen > Views view.The list of available views appears.
5. Select the view that activates a SmartScript when this view is accessed.
6. In the Auto SmartScript field, select the SmartScript to run when the view selected ![clip_image034[1] clip_image034[1]](http://lh5.ggpht.com/-ey_e3biqgy0/TuZEaSRh_fI/AAAAAAAAIcg/QA_n5YrnDFk/clip_image034%25255B1%25255D_thumb.jpg?imgmax=800)
Invoking Scripts Using Siebel VB or Siebel eScript
RunSmartScript: This function invokes a SmartScript programmatically. This function has extra parameters View Name and Applet Name. The viewName parameter allows a view other than the default agent’s SmartScript view to be accessed. This is useful if an alternative view is configured for a specific purpose. The view specified must contain an instance of the SmartScript Player Applet to present the SmartScript interface to the agent.
RunSmartScript callScriptName, pathId, language, currency, viewName, appletName
Siebel VB Example
InvokeMethod “RunSmartScript”, “Pentium II Script”, “”, “ENU”, “USD"
Siebel eScript Example
InvokeMethod (“RunSmartScript”, “Pentium II Script”, “”, “ENU”, “USD");
Siebel Applet Button Example
Sub ButtonScript_Click
TheApplication.InvokeMethod “RunSmartScript”, “Pentium II Script
End Sub
